Understanding NodeLists

Just a quick recap about lists in programming:
A list is nothing but a collection of items or data.
In the real world, a list could be a collection of music albums, shopping items, etc.
But sooner or later, you have to deal with these real-world lists in your coding projects, too.
For example:
- If you're creating a music app like Spotify, you must mimic a music album list using the code
- Similarly, if you're building an e-commerce store, you have to work with various lists such as shopping cart lists, product catalogues, etc.
And we also know that there are two primary ways to create lists in Javascript:
- Array - It allows us to create and manage a standard list with real-world data, such as a list of countries, shopping cart items, product lists, questions for the quiz, etc.
- NodeList - ???
You already know how to work with arrays, so now let's understand NodeLists and how to work with them.
So, what is a NodeList?
A NodeList is nothing but a collection of HTML elements selected from a web page.
An array list can be created manually:
let iPhones = ["iPhone 11", "iPhone 12", "iPhone 13"];But unlike an array, you can not create a NodeList manually.
A NodeList is created automatically when we select multiple HTML elements using the document.querySelectorAll() method or similar methods.
For example, let's say there are some FAQ elements on a web page with a class name of faq:
<div class="faqs">
  <div class="faq faq-1">...</div>
  <div class="faq faq-2">...</div>
  <div class="faq faq-3">...</div>
  <div class="faq faq-4">...</div>
</div>
And let's say you have selected all those FAQs using the document.querySelectorAll() method:
let faqs = document.querySelectAll(".faq");This is when a NodeList is created automatically.
You can inspect the newly created NodeList using the using the console.log() method:
let faqs = document.querySelectAll(".faq");
console.log(faqs);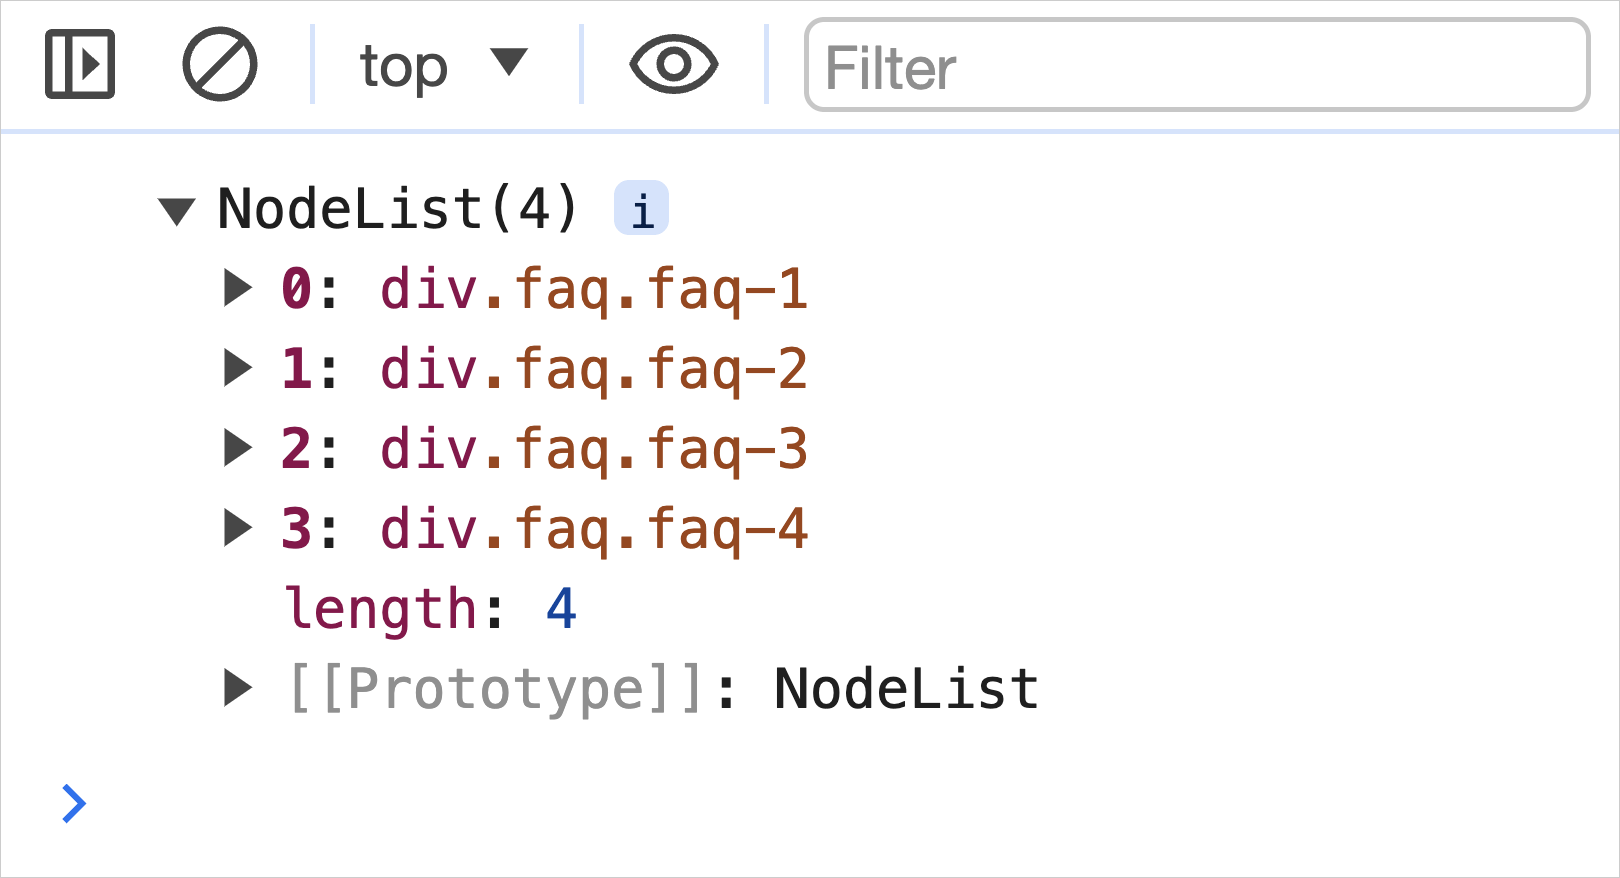
And as you can see, a NodeList created is indeed a collection of HTML elements.
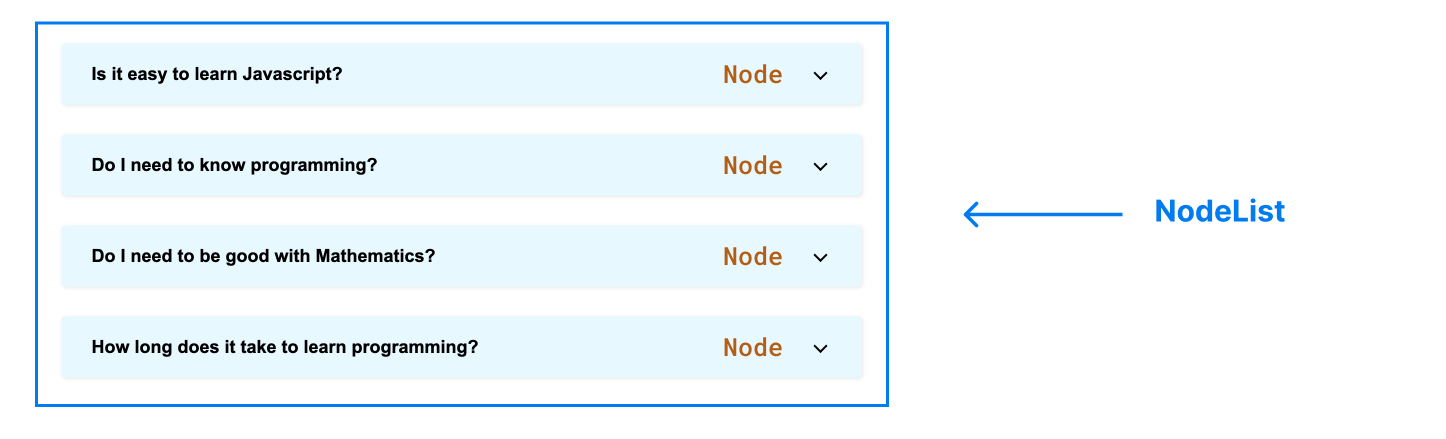
Also, we call an individual HTML element inside the Nodelist as a Node. There is more meaning to being a Node, but discussing that is not relevant right now.
Having said that now comes an important question:
Why do we need to create a NodeList by selecting multiple HTML elements at the same time?
And the answer is simple.
We usually create a NodeList when we want to manipulate multiple HTML elements in the same way.
For example, adding an event listener to multiple HTML elements at the same time.
Let me elaborate...
So far, we have been manipulating only one HTML element at a time
For example:
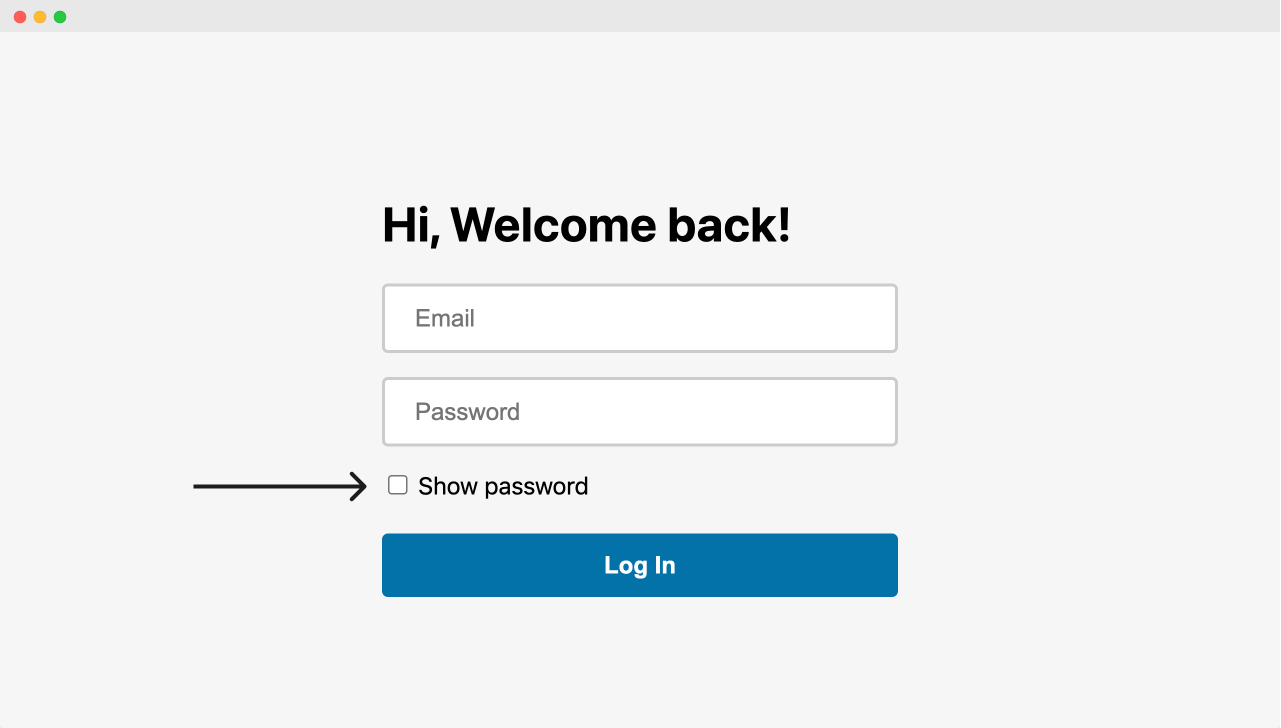
1) During the Show/Hide project, we manipulated the "Show Password" field by adding click interactivity to it and nothing else:
2) Similarly, for the accordion project, we manipulated the "Header" element of the faq so that it becomes clickable:

3) Finally, for the Off-Canvas menu, we added interactivity to the Hamburger icon:
Now, I am not trying to say that we did something wrong with the above projects.
We didn't.
These projects were great for understanding how to work with a single HTML element at a time.
However...
Real-world web pages often have scenarios where we manipulate a bulk of HTML elements at the same time.
For example:
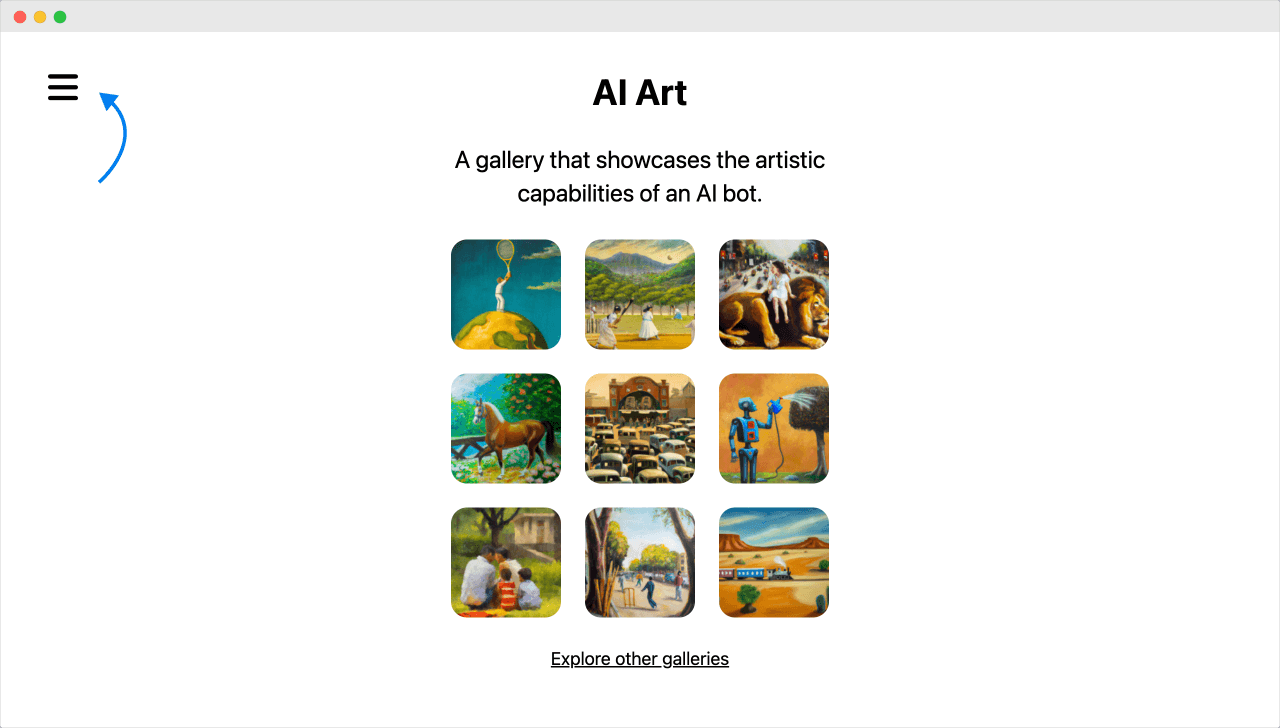
1) Imagine we're building a photo gallery
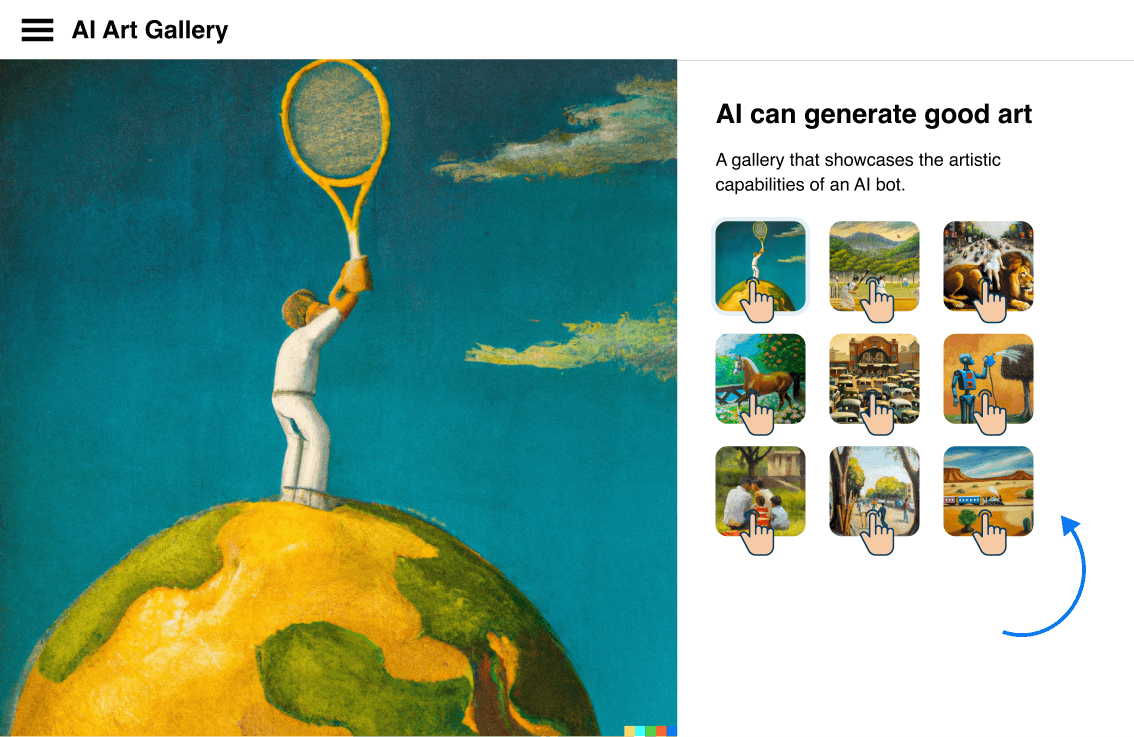
Here, we can't just make one thumbnail clickable.
We need to make all thumbnails clickable to create a gallery.
This way, when a user clicks on any thumbnail, it shows the full-sized version of that particular thumbnail.
2) Similarly, It is very rare to have only one FAQ on a web page
Usually, there are several questions, and each must be expandable (clickable) to reveal the answer.
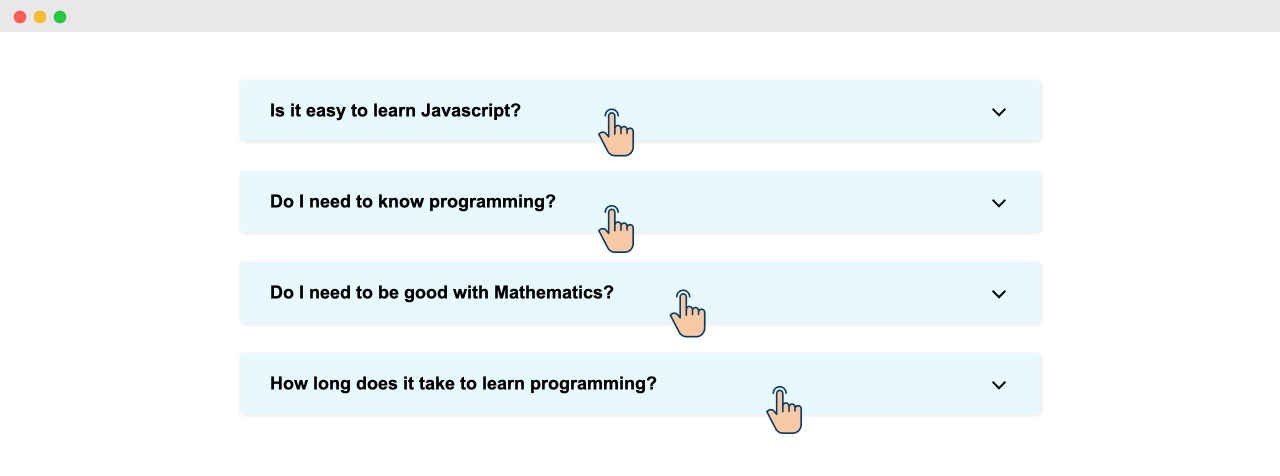
To achieve this, we have to make all FAQs clickable.
And this is exactly why:
- We need to select multiple HTML elements at the same by creating a NodeList.
- Then, make each HTML element interactive by looping over them one by one and adding an event listener to them.
In the next lesson, we will compare NodeLists with Arrays and how we can use the "for" loop statement with a NodeList, too.