How to change HTML using Javascript

As I said in the last lesson, when you're trying to code anything in Javascript:
- You need to select an HTML element
- And then manipulate its attributes or content to achieve the desired interactivity.
But what happens when we select an HTML element and how can we manipulate it?
The answer is simple.
Whenever we select an HTML element in javascript, we get an object that represents the selected HTML element.
And we usually manipulate that object to manipulate the HTML element.

Haha! Sorry about that. I understand it could be confusing.
Actually, it is better shown than explained.
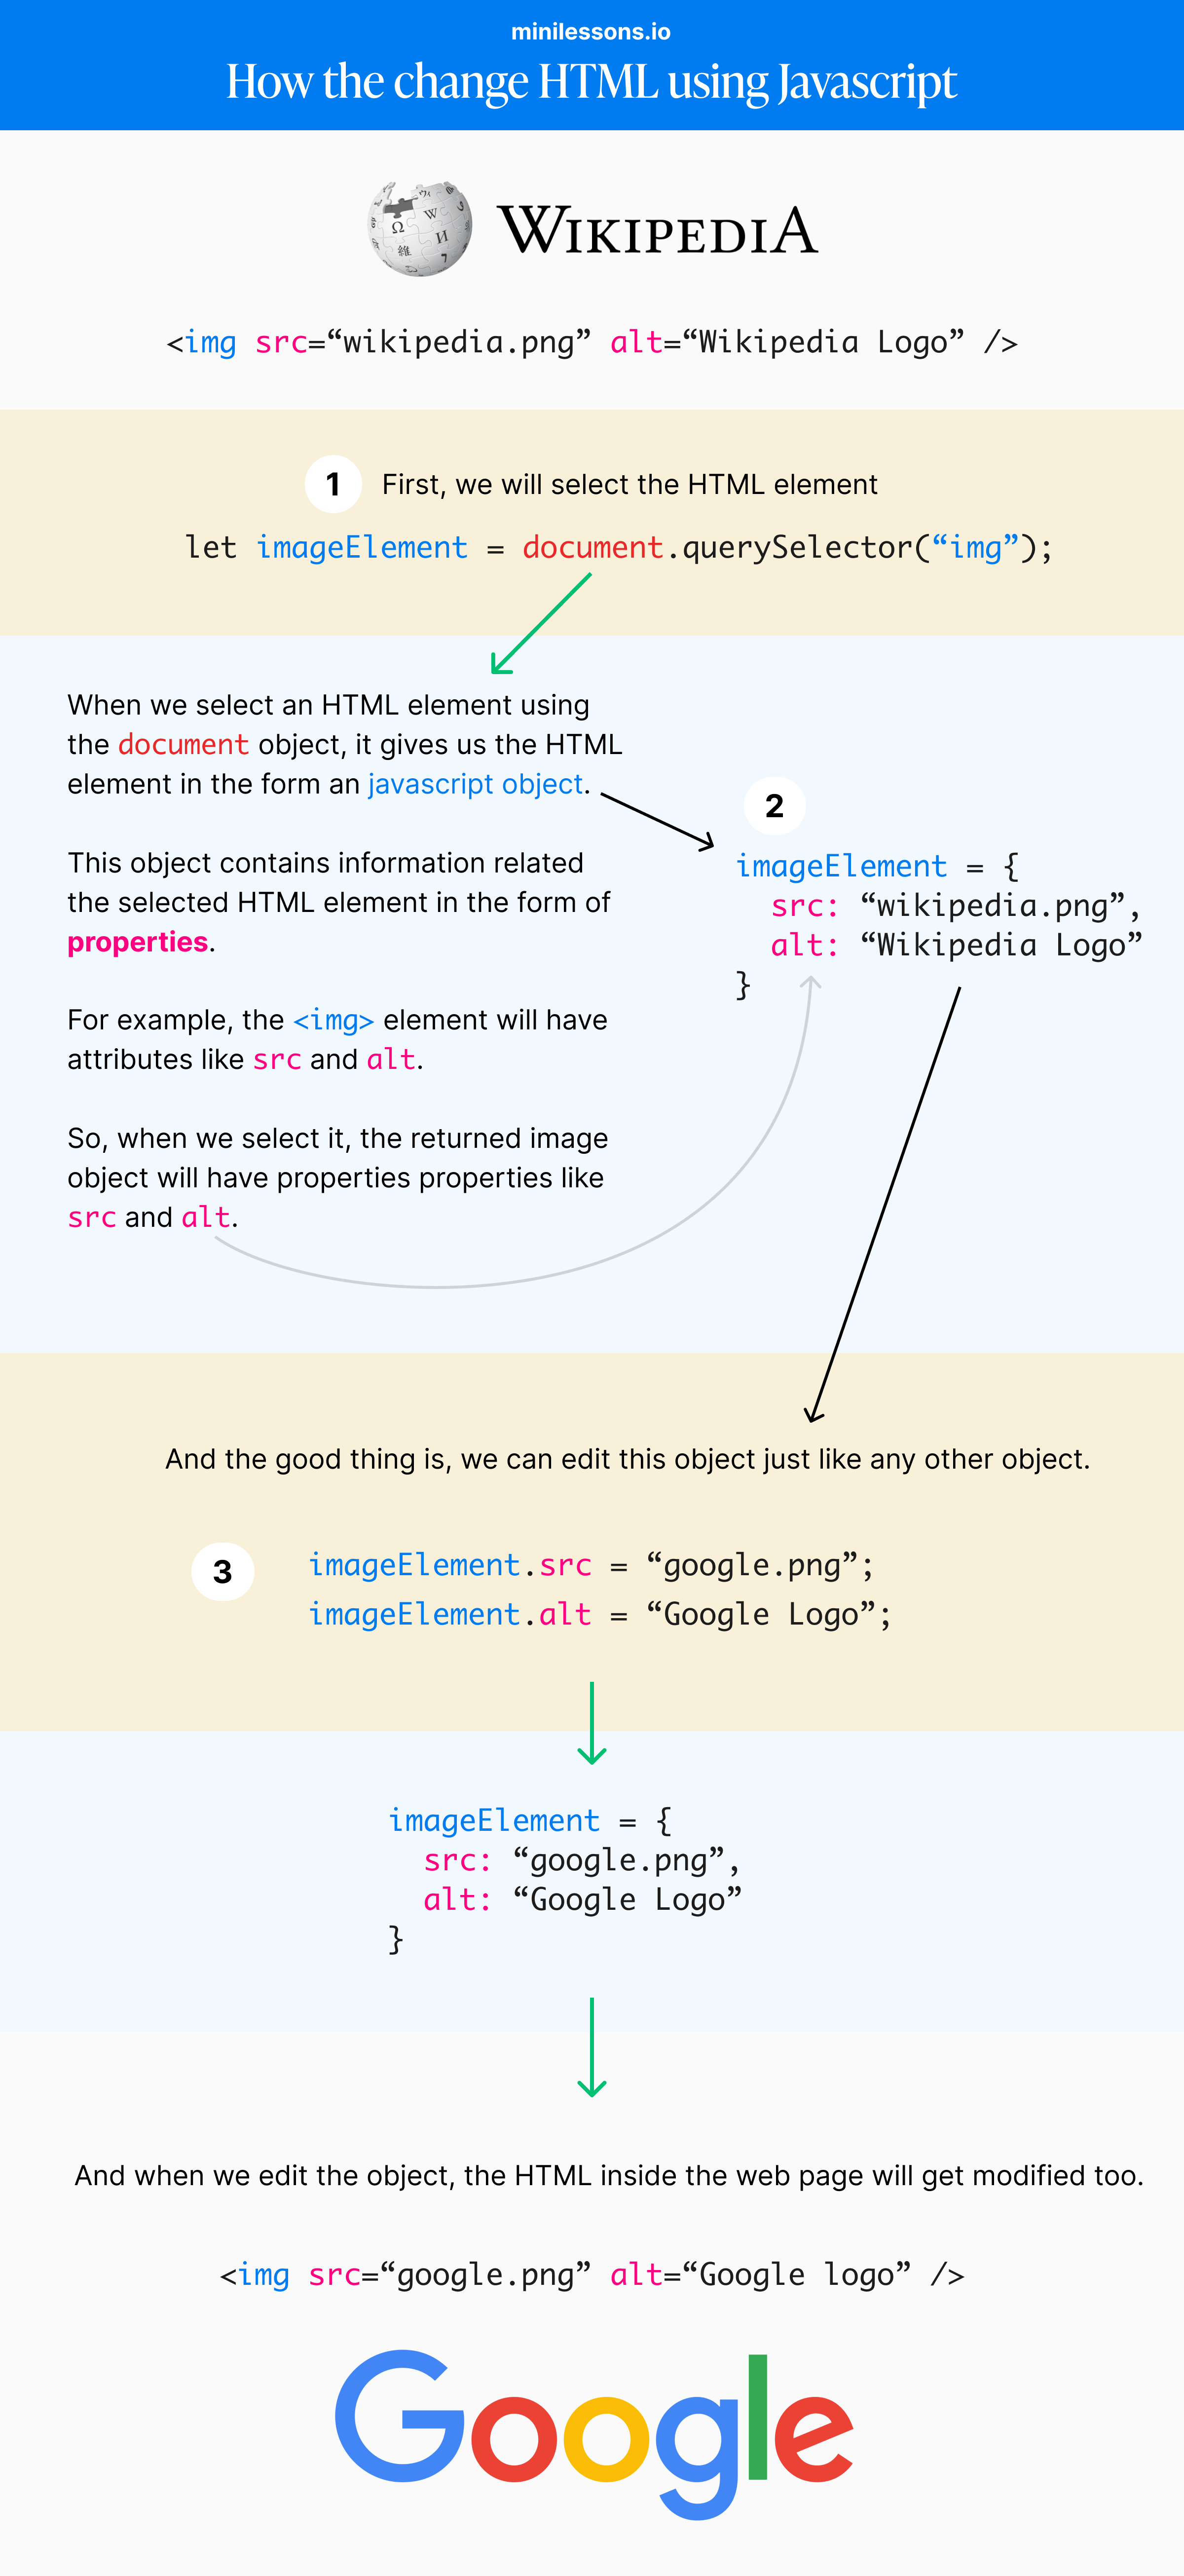
How to change the image in HTML using javascript
Let's imagine we have an img element that outputs the Wikipedia logo:
<img src="wikipedia.png" alt="Wikipedia Logo" />And our goal is to change it to display the Google logo instead:
<img src="google.png" alt="Google Logo" />Here is the infographic explaining how we can achieve it:
Go through it carefully.
index.html file.Come on, let's perform a small task based on what you've learned in this lesson.
Task: Changing the brand
Download and Open up the project files inside your code editor.
And here is the project structure:
.
└── changing-the-brand/
    ├── index.html
    ├── style.css
    ├── index.js
    └── images/
        ├── google-logo.png
        └── wikipedia-logo.png
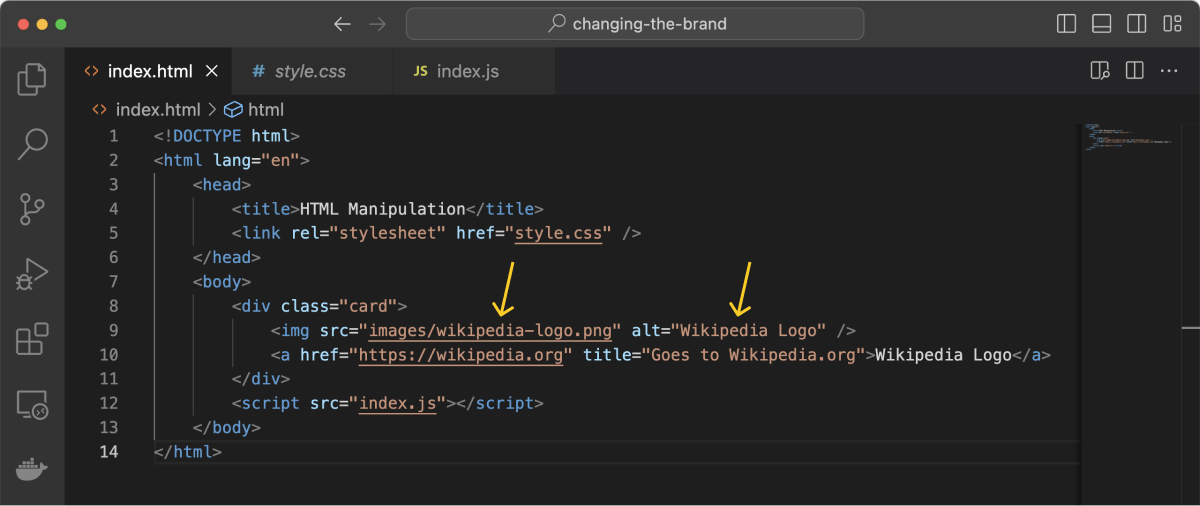
The code inside the index.html file is pretty basic.
<!DOCTYPE html>
<html lang="en">
    <head>
        <title>HTML Manipulation</title>
        <link rel="stylesheet" href="style.css" />
    </head>
    <body>
        <div class="card">
            <img src="images/wikipedia-logo.png" alt="Wikipedia Logo" />
            <a href="https://wikipedia.org" title="Goes to Wikipedia.org">Wikipedia Logo</a>
        </div>
        <script src="index.js"></script>
    </body>
</html>- I have linked the
style.cssandindex.jsfiles. - Contains a
cardelement that holds an image and text about Wikipedia.
Similarly, the code inside the style.css file is pretty basic too. It just contains the styling for the card element.
The index.js file is empty.
Finally, the image directory contains the logos of Wikipedia and Google.
That's all.
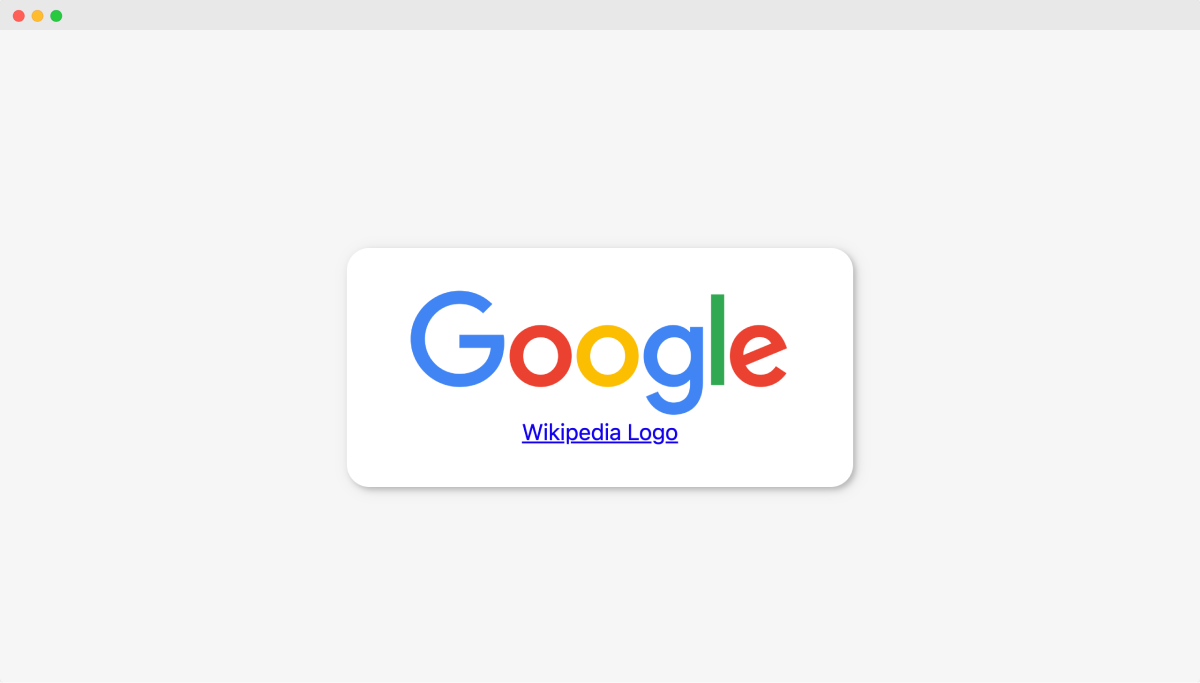
If you open up the index.html file in the browser, you should see the following output:

As you can see, there are two elements:
- Image of Wikipedia
- Hyperlink with the text "Wikipedia logo"
And our job now is to replace information related to Wikipedia with Google.
First, let's replace the Wikipedia logo with the Google logo and we can do it in two easy steps.
//Step 1: Selecting the Image element
let imageElement = document.querySelector(".card img");

//Step 2: Change the src and alt text of the image
imageElement.src = "images/google-logo.png";
Step 1: Selecting the HTML element
Open up the index.js and type the following code:
//Step 1: Selecting the Image element
let imageElement = document.querySelector(".card img");
In order to do anything with the image, first we have to select it.
So, we are selecting the image using the document.querySelector() method.
When we select an HTML element using the document object, it gives us the HTML element in the form of a javascript object.
This object contains information related to the selected HTML element in the form of properties.
In our case, the <img> element will have attributes like src and alt, right?
So, when we select it, the returned image object will have properties like src, alt, and hundreds of other properties that we are not aware of.
Come let's take a look at the object by logging it into the browser console:
//Step 1: Selecting the Image element
let imageElement = document.querySelector(".card img");
// log it to the Browser Console
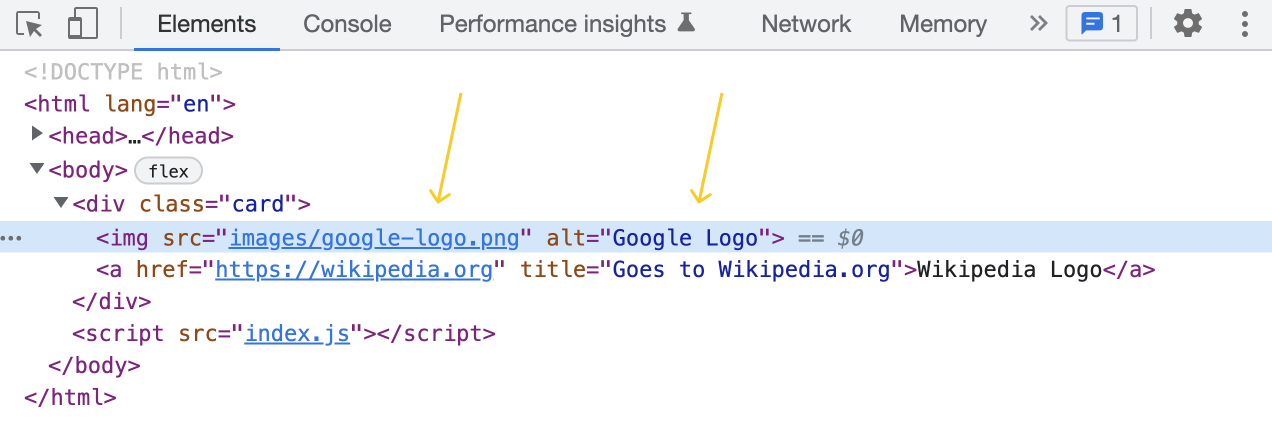
console.dir(imageElement);Now open up the index.html in the browser and then open up the Browser Console:
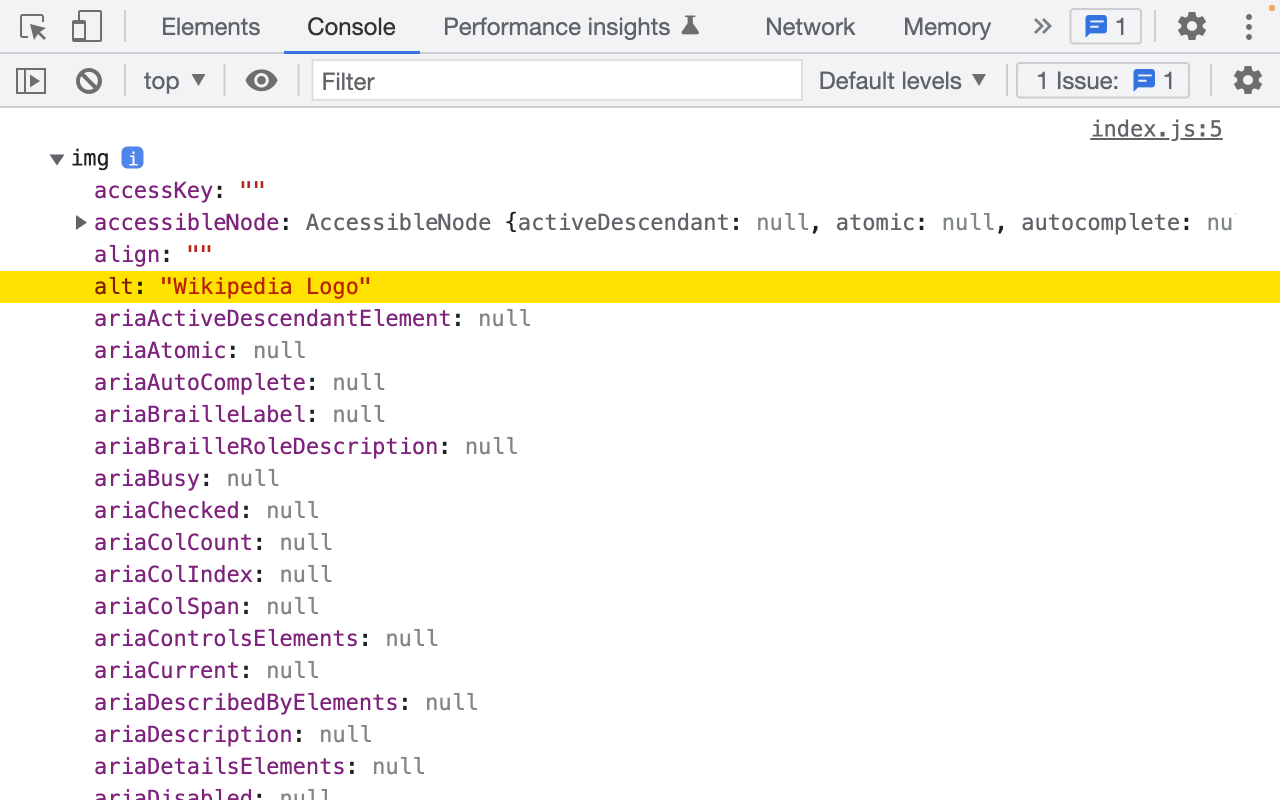
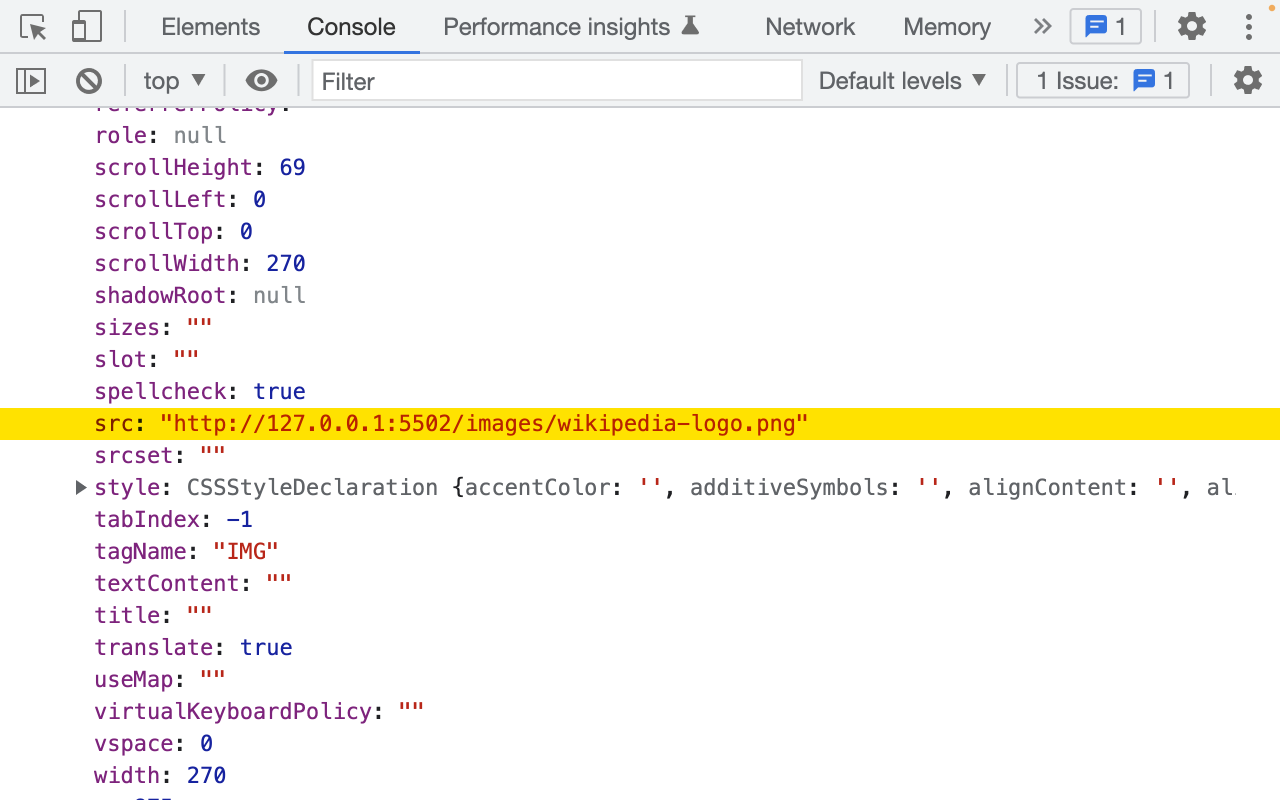
Wow!
As expected, The image object has a lot of properties and methods.
For example, in the above image, we are seeing the
src and alt properties because we have selected an img element.But if we select an
<a> tag, you'll see the href property and you won't find the src and alt properties because <a> tag doesn't support the src or alt attributes.Anyway, the good thing is, we can edit this object just like any other object.
So, in order to change the image:
- We just have to assign a new URL to the
srcproperty of theimageElementobject. - And we should also change the value of the
altproperty so that it reads "Google Logo".
Step 2: Change the src of the image and its alternative text
//Step 2: Change the src and alt text of the image
imageElement.src = “images/google-logo.png”;
imageElement.alt = “Google Logo”;
Now because we have modified the image object with new information, the HTML inside the web page will get modified too.
So, if you go ahead and refresh the index.html inside browser, you should see the Google logo instead of the Wikipedia logo.
If you inspect the image element, you'll also see the alt text related to Google.
Also, as I said before, whenever we change HTML using Javascript, this change only affects the HTML inside the web page.
It doesn't affect the source of the HTML file.
So, if you open up the index.html file, you'll still see an image element with Wikipedia-related information.
Keep this in mind.
The Javascript instructions you write are only for the web browser.
Anyway, if you notice, although we have changed the image and its alternative text, the hyperlink below the Logo still says "Wikipedia Logo".
We have to change it too.
The good thing is, we can follow the same two-step process.
Come on, let's quickly do it.
Changing the hyperlink and its text to use Google information
//Step 1: Selecting the Hyperlinik element
let hyperLinkElement = document.querySelector(".card a");

//Step 2: Change the href attribute and the text content
hyperLinkElement.href = "https://google.com";
hyperLinkElement.text = "Google Logo";
In the above code, first, we have selected the <a> tag and then:
1) We are changing its href property to change the URL:
hyperLinkElement.href = "https://google.com";
2) Finally, we are changing its text property to change the text:
hyperLinkElement.text = "Google Logo";As easy as that.
Anyway, if we now refresh and preview the index.html again, you'll see that text and the link got changed.
That's it.
That's how you change HTML using Javascript.
Of course, there is a lot more to learn but this knowledge is enough for now to learn the advanced basics of Javascript.
In the next lesson, we will perform a small exercise to cement this knowledge.