Creating HTML elements using Javascript

More often than not, you'll end up creating a lot of HTML elements using Javascript.
Imagine the following HTML Document:
<!DOCTYPE html>
<html>
  <head>
    <!-- Contents of the element -->
  </head>
  <body>
      <h1>About US</h1>
  </body>
</html>
Next, imagine that you want to insert a paragraph element inside the body element via Javascript:
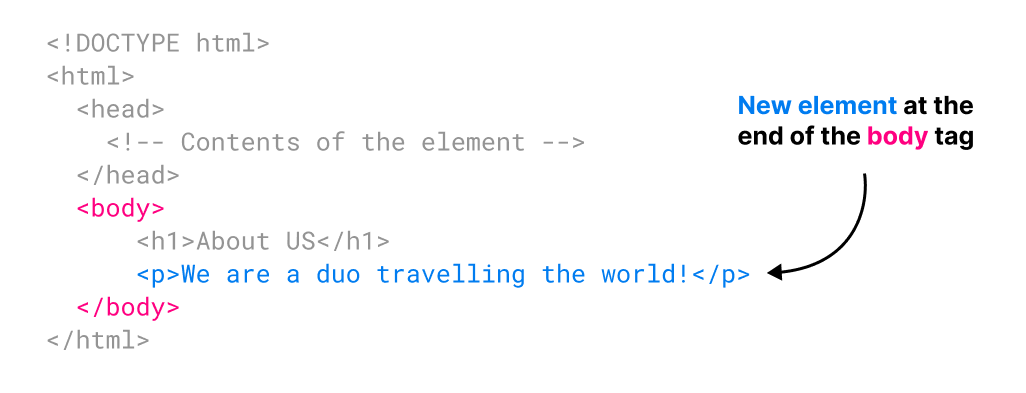
If you notice, we want to insert the following paragraph right at the end of the body element:
<p>We are a duo travelling the world!</p>Here is how to achieve this in four simple steps:
//Step 1: Create the paragraph element and save it to a variable
const newParagraphElement = document.createElement("p");

//Step 2: Assign text content to the newly created paragraph element
newParagraphElement.textContent = "We are a duo travelling the world!";

//Step 3: Select the "body" element
const bodyElement = document.querySelector("body");

//Step 4: Append the newly created paragraph element as a child to the "body" element
bodyElement.appendChild(newParagraphElement);
Come on, let's break it down piece by piece.
Step 1: Create an HTML element (paragraph)
As you already know, the entire HTML Document is available to us via the document object in Javascript.
And the document object has a method called createElement.
It will help us create an HTML element using the following syntax:
document.createElement("tagname");The createElement accepts the tag name of the HTML element as a parameter.
For example, if you want to create a "Heading Level One" element, you have to provide h1 tag name as the parameter:
document.createElement("h1");When the Javascript engine executes this line of code, it will create an empty heading element with no content:
<h1></h1>Similarly, if you want to create a paragraph element, you have to provide p tag name as a parameter:
document.createElement("p");When the Javascript engine executes this line of code, it will create an empty paragraph element with no content.
<p></p>You get the idea, right?
Come on, let's try this out.
//Step 1: Create the paragraph element and save it to a variable
const newParagraphElement = document.createElement("p");
In the above code, we first create a paragraph element using document.createElement method.
The document.createElement method returns the newly created HTML Element.
So, we are saving it in a variable to add content in the next step.
The variable newParagraphElement now has an empty HTML element inside it:
<p></p>However, creating an empty element is not enough. We have to add some text content to it.
Step 2: Assign text content to the newly created paragraph element
Whenever we create or select an HTML element in Javascript, and if it is a text-based element such as a paragraph, h1, etc., we will get access to a property called textContent.
As the name suggests, the textContent property allows you to add text-based content to an HTML element.
So...
//Step 1: Create an HTML element and save it to a variable
const paragraphElement = document.createElement("p");

//Step 2: Assign a value to the newly created element
paragraphElement.textContent = "We are a duo travelling the world!"
In the above code, we are assigning the text We are a duo travelling the world! to the newly created paragraphElement using the textContent property.
The textContent property adds the text in between the opening and closing tags of an HTML element. So, it results in:
<p>We are a duo travelling the world!</p>Nice!
Again, creating an element and adding content to it is not enough.
The new element must be inserted into the web page.
Otherwise, website visitors can not see it.
As of now, the new element is somewhere inside the Javascript memory. It is not added to our web page yet.
So...
Step 3: Selecting a suitable parent element to insert the newly created element as a child element
What are parent and child elements?
Inside an HTML Document, apart from the root <html> element, every other element is a child of a particular HTML element.
For example, imagine the following HTML Document structure:
<html>
  <head>
    <link rel="stylesheet" href="style.css" />
    <meta charset="utf-8" />
    <script src="custom.js"></script>
  </head>
  <body>
    <h1><a href="#">About Us</a></h1>
    <p>We are a duo <em>travelling</em> the world!</p>
    <div>
      <p>We want you to do the same!</p>
    </div>
  </body>
</html>
If we convert the above HTML document into a parent-child relationship between elements, it looks similar to this:
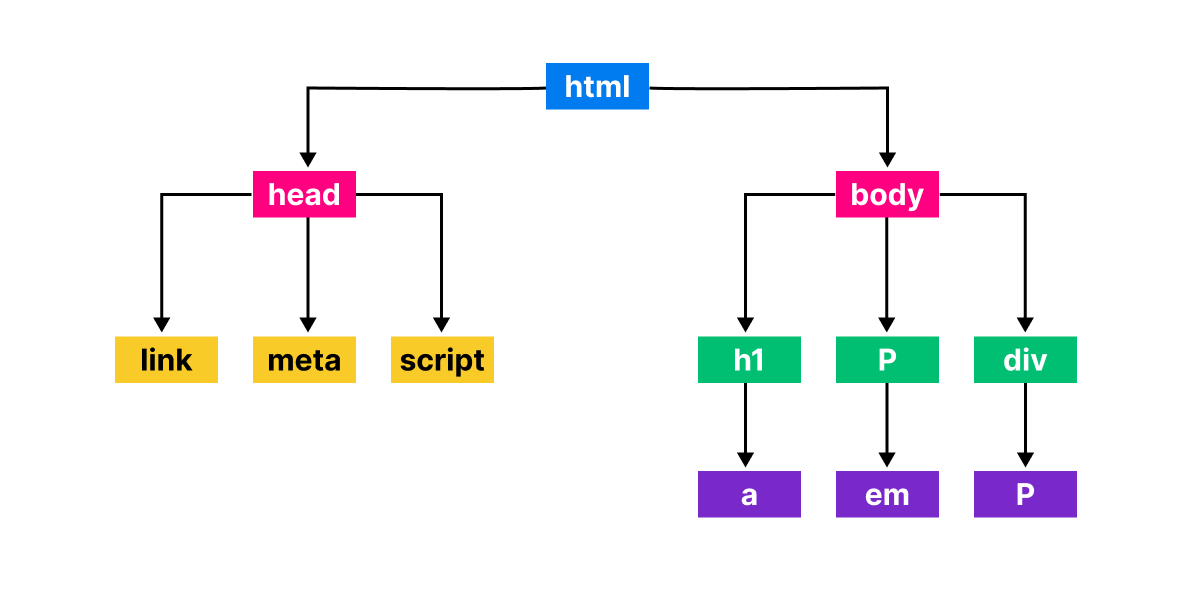
If you observe the above diagram, <head> and <body> elements are the children of <html> element.
Similarly:
<link>,<meta>, and<script>elements are the children of<head>element.<h1>,<p>, and<div>elements are the children of<body>element.
It is important to understand this parent-child relationship between elements because whenever you're inserting an HTML element via Javascript, one common question you would ask yourself is:
"Inside which parent element should I insert the newly created HTML element?"
In our case, we want to insert the paragraph element inside the body element, right?
So, select the body as the parent element:
//Step 1: Create the paragraph element and save it to a variable
const newParagraphElement = document.createElement("p");

//Step 2: Assign text content to the newly created paragraph element
newParagraphElement.textContent = "We are a duo travelling the world!";

//Step 3: Select the "body" element as the parent element
const bodyElement = document.querySelector("body");
Step 4: Insert the new element as a child to the selected parent element
We can easily achieve this by using the appendChild method on a parent element:
bodyElement.appendChild(newParagraphElement);appendChild() must be used on a parent element where you want to insert a child element.Here is the entire flow once again:
//Step 1: Create the paragraph element and save it to a variable
const newParagraphElement = document.createElement("p");

//Step 2: Assign text content to the newly created paragraph element
newParagraphElement.textContent = "We are a duo travelling the world!";

//Step 3: Select the "body" element as the parent element
const bodyElement = document.querySelector("body");

//Step 4: Finally, append the newly created paragraph element as a child to the body element
bodyElement.appendChild(newParagraphElement);
1) First, we have created a paragraph element (nothing new)
const newParagraphElement = document.createElement("p");This will result in:
<p></p>2) Then, we have assigned some text content to it (nothing new)
newParagraphElement.textContent = "We are a duo travelling the world!";
This will result in:
<p>We are a duo travelling the world!</p>3) Next, We want to append this paragraph element as a child to the body element, right? So, we are selecting the body element.
const bodyElement = document.querySelector("body");4) Finally, by using the appendChild method on the body element, we have inserted the newly created paragraph element as a child inside the body element:
bodyElement.appendChild(newParagraphElement);This will result in:
<!DOCTYPE html>
<html>
  <head>
    <!-- Contents of the element -->
  </head>
  <body>
      <h1>About US</h1>
      <p>We are a duo travelling the world!</p>
  </body>
</html>
The appendChild() method always adds the new element at the end of the parent element.
For example, let's imagine there are multiple elements after the <h1> element:
<!DOCTYPE html>
<html>
  <head>
    <!-- Contents of the element -->
  </head>
  <body>
      <h1>About US</h1>
      <h2>We are the best :D</h2>
      <p>You can contact us anytime!</p>
  </body>
</html>
Even in this scenario, executing the following code:
//Step 1: Create the paragraph element and save it to a variable
const newParagraphElement = document.createElement("p");

//Step 2: Assign text content to the newly created paragraph element
newParagraphElement.textContent = "We are a duo travelling the world!";

//Step 3: Select the "body" element as the parent element
const bodyElement = document.querySelector("body");

//Step 4: Finally, append the newly created paragraph element as a child to the body element
bodyElement.appendChild(newParagraphElement);
Shall result in:
<!DOCTYPE html>
<html>
  <head>
    <!-- Contents of the element -->
  </head>
  <body>
      <h1>About US</h1>
      <h2>We are the best :D</h2>
      <p>You can contact us anytime!</p>
      <p>We are a duo travelling the world!</p>
  </body>
</html>
That's all you need to know about creating HTML elements via Javascript for now.
But there is a lot more to it.
So, we will come back to this topic in a future module.
In the next lesson, we will put this knowledge to a real-world exercise.